Monday, November 26, 2012

Week #10 Gift Wrapping Techniques


This week we’re going to be teaching you creative ways to wrap gifts, make bows, and create super cute gift tags!!! The best part is we’ll be using newspaper, brown packing paper, magazines and other random things like toilet paper roles and cereal boxes and only 3 pieces of tape to create BEAUTIFULLY wrapped gifts!!!

The list is easy this week. We have extra paper, ribbons, embellishments, some extra boxes, twine, stickers and all that good stuff, if you don’t have it at home.

Supplies

  • Small to Medium size Boxes (any kind of box cereal box, macaroni box, whatever you have laying around will do)
  • Toilet paper roll (if you happen to have any lying around, bring them)
  • News Paper or old magazine
  • Old Christmas Cards
  • Accessories (if you have them, bring them): Paint, Ribbon, Twine, Scrap of Fabric, Burlap, Stamps, Stickers, Buttons, Feathers, Glitter….whatever your heart desires J

Tools

  • Scissors
  • Clear tape
  • Glue Gun
  • Ruler (not necessary, but might be helpful)

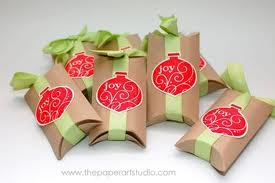
Here are some examples for inspiration!


I hope you all had a wonderful Thanksgiving!!! There is so much to be thankful for and often it’s easy to overlook how much God has done in our lives, families, and community. It’s so easy to focus on the things we lack and forget to see the things we have… most often I forget about the many ways in which God has provided for us, blessed us, and done for us. It’s good to have days like Thanksgiving, to help remind us how important it is to be Thankful.

 Do not be anxious about anything, but in every situation, by prayer and petition, with thanksgiving, present your requests to God” Phil 4:6


I’m so thankful for you ladies and can’t wait to see you tonight!!!

God bless,
Jo

Friday, November 16, 2012

Week #9 - Cake Pops and Cupcake Toppers


'Tis the season for baking and decorating! This week we will be making Holiday themed Cake Pops and Cupcake Toppers. You'll be surprised how easy and fun these are to make. These beautiful little treats will undoubtedly be the "Dessert Star" at all your Christmas Parties!

Cake Pops

If you look on Pinterest you'll find a ton of cute Cake Pop Inspiration! For those who want to make these at home, check out these blogs for tutorials and a list of Cake Pop Ingredients:


Peppermint Vanilla Cake Pop Tutorial: http://blog.candiquik.com/?p=2707
Christmas Cake Pops Tutorial: http://www.taste.com.au/recipes/27602/christmas+cake+pops


Cupcake Toppers

Cupcake toppers are a great way to use up your left of scraps of Scrapbook Paper. You can use them for ALL occasions Christmas, Birthdays, Weddings, and any other event you want to celebrate with a beautifully yummy cupcake!

Check out this site for 5 different crafty cupcake topper tutorials and supply list! http://cakejournal.com/cake-lounge/top-5-crafty-cupcake-topper-tutorials/

Our lovely Hannah made so BEAUTIFUL samples to use as inspiration!

Supplies

For those who are coming to class on Monday, here is the list of supplies you will want to bring:You won’t need to bring much this week. The most important supplies will be:

  • A large bowl (for mixing)
  • A plate (to take home your goodies)
If you have the following supplies bring them, but if not, no worrie’s we’ll have extras:
  • Scrapbook Paper
  • Cake Pop (or Lollipop) sticks
  • Frosting Bag
  • Plastic/Metal Frosting Tips
  • Spatula
  • Ribbon
  • Sitckers
  • Scrapbook Emblishments
  • Jewels
As far as Tools, you’ll want to bring:
  • Scissors
  • Spoon
  • Glue Gun
Be sure to check out the pictures below for inspiration! I’m so excited to do this project with you. It’s pretty messy but so worth it! See you Monday at 7 in room 109!

God bless you ladies! Jo

Cake Pop & Cupcake Topper Inspiration!


Thursday, November 1, 2012

Week #7 - Wooden Signs


Happy week my fellow Pinterest addicts! 

I am a busy lady being pulled in a million directions by children, adults, pets, work, you name it! I would like to think that my morning quiet time and moments of prayer throughout the day keep my attention on the Lord, but in reality, I need a lot of reminding! I like to be surrounded by verses and inspirational words wherever I turn. 

At my desk it may take the form of sticky notes and daily verses sent via email, my little daily devotional calendar, but at home the reminders are all over my walls! Rather than purchasing signs that others have made I like to make my own, and because of the wonderful world of Pinterest, I have found a tutorial to easily make my own wooden signs!

My children have an amazing CD of verses that span the alphabet, they are short, catchy and very easy to remember. I often hear them walking around the house singing. Track 8 for H is one of their favorites, it says, “Happy are the people whose God is the Lord. Psalm 144:15”

I loved that memory and that verse so much that I decided it would be my first wooden sign! 


The inspiration for this project comes from a pin bringing me to a wonderful website called Homespun Happenings: http://homespunhappenings-tammy.blogspot.co.uk/2012/04/i-made-sign.html?m=1.

How to Make a Wooden Sign

I started by painting a board slightly unevenly with white paint.

Then I printed the verse to fit the dimensions of the board.  I just printed one or two words per paper and then cut them out.  I forgot to take pictures of the next couple stages so I am going to use the ones from Homespun Happenings! I then covered the back of the printed words with pencil and then taped them (pencil colored side down) onto the wood and tape them into place. 


Once it is taped in place, I traced the words with a pen and the pencil lead transferred onto the wood providing the outline of the words.

Here is mine:

After you have the outline, you can choose to color in the words with either paint or Sharpie marker.  I just used a Sharpie and I loved how easy it was!

As a finishing touch, you can use sand paper to rough up the lettering to make it look more vintage. Here is my finished product! (Sorry for not cropping my feet out of the picture!)

Here's the finished product!!!!


If you want to transfer your lettering to a black or colorful painted board, you can use the same technique using chalk rather than pencil.


Here are some other fun wooden signs that I have seen on Pinterest! I am excited to recreate a few of these especially with the holidays quickly approaching!


Supplies!!!


  • Wood Board – scrap or new
  • Printed Word, Phrase, or Scripture – Bring printed copy with font in “actual” size
  • Paint (if you are planning to paint you board)
  • Sharpie (it works best if it’s new)
  • Pencil (and sharpener)
  • Tape
  • Scissors

Go ahead, fill your home with your favorite words and remind yourself what matters most to you!

 -Hannah