Friday, October 26, 2012

Week #6 - Upcycled Jewelry!!!

My mom is the primary inspiration for my love of all things creative and crafty! As long as I can remember, she was always working on some sort of creative and unique project.

But the most inspiring thing about her art is her unique point of view. She never looks at something just as it is; she sees it for what it has the potential to be. She’ll incorporate some of the oddest objects into her projects, but somehow they always turn out beautiful. She has made jewelry boxes out of eggshells, doll heads out of dried apple cores, earrings out of old jean rivets, a wedding dress from sheets and curtains, and wall art from bits of wood and rusty pieces of metal.

My mom and I frequently walk together. On most occasions, by the time we get home her pockets are full or random rocks, pop can tabs, sticks, a few nuts and bolts, rusty scrap metal, a smashed bottle lid or two along with a variety of other random items she’s picked up off the ground. To most people, her findings would be nothing more than a pile of trash. But to her, they are unique treasures, each having the potential to be transformed into a beautiful work of art. And she’s always right…

So this week’s project is a bit of a tribute to my Mom, the person who taught me to see the potential for beauty in ordinary objects.

The “ordinary” objects we’ll be incorporating into this week’s beautiful Jewelry Pieces are:

Spare Change, A Softball, Salt, Flour, An old belt, A page from a book, A small lid & a button.

Sounds exciting huh?! Well after looking at the pictures below you’ll start to see the benefits of having my mom’s unique point of view. An ordinary object is only ordinary because the viewer has chosen only to see the object only for what it is, not for what it can become….

Glass Pendant
Below was my first attempt at a glass pendant...turned out okay!
I made this using a left over piece for scrap book paper, a broken leave charm, glass and  clear puff paint.


Leather Cuffs
These are all manly cuffs that I have made as gifts for different fellows over the last year!
I made this cuff for my husband as a gift. I used a scrap piece of leather, hemp (left over from the friendship bracelet days in Junior High), dominoes (without dots), and a metal coin.


This is a cuff I made for my brother. Same technique as above, but I glued a feather charm to one of the dominoes and used a button from some old jeans to secure the bracelet on (see pic below)


Snaps are another great way to secure the cuff on!
I added a small picture to one of the dominoes using mod podge to secure it on and mod podge dimensional magic to add a gloss coating to it.

Here are examples of more feminine style leather cuffs that I've also made as gifts for my lovely friends over the year. These were made with scrap leather and embellishments like buttons, feathers, & lace.


Softball Skin Cuffs
I made these both using the skin from a Softball and lined them with beaded trim. The black one was painted with acrylic paint and both were embellished with a flower.


Salt Dough Charms
These are made from salt, all purpose flour and water! I did not make the below charms, but they are super cute examples so I wanted to share them with you! For recipe and Instructions click here: http://www.homeheartcraft.com/blog/salt-dough-recipe-create-jewelry-more


This one is another Salt Dough charm that has a finger print from each family member embedded and stamped with the date. It's painted with Silver Leafing (found in the paint section of most craft stores) to give it a metallic look.


This one is another Salt Dough charm that has a finger print of a husband and wife. It's painted with Silver Leafing (found in the paint section of most craft stores) to give it a metallic look.


This one is another Salt Dough charm stamped and painted with Silver Leafing !


Resin Coin Charms
I didn't make these either, and truth be told these are not all done using a coin, BUT they are examples of charms you can make USING a coin, and image, and Mod Podge Dimensional Magic to give it that clear dome look!


These were actually done on real pennies! So cute!

SUPPLIES!!!

I have listed ALL the supplies needed for the projects, but for those coming to class – several of these items will be provided, so you only need to bring the items in red this week!

LEATHER CUFFS:
  • Leather:  You can use an old belt or you can pick up a piece of scrap leather from JoAnn’s or Michaels. If you’re ambitious, you can also swing by Goodwill and find an old leather vest or jacket and slice that puppy up.
  • Embellishments: You can do as little or as much as you want. For a woman’s cuff you could use things like lace, buttons, beads, charms, and brads (yep, the same ones used for scrap). For men’s cuffs, you could use chunky metallic beads, dominoes (pre-drilled), you could even use nuts and bolts from the garage….again, be as creative as you want with these!
  • Embroidery or Upholstery Needle: There will be a bit of stitching involved in this one so you’re going to need to use a large needle.
  • Embroidery Floss or Hemp
  • Snaps (and tool for attaching snaps): I’ve found snaps are the best way to secure these cuffs (I usually use two – four depending on the width)

SOFTBALL SKIN CUFFS:
  • Used Softball or Baseball: (one that can be torn up – you can usually get these at Goodwill or just ask around…someone’s bound to have a few laying around)
  • Large Button or Bead: (This will be used to keep the cuff closed around your wrist)
  • Felt: This will line the inside of the cuff (adhere with a fabric glue)
  • Embellishments: You can add these where you want!
  • Embroidery or Upholstery Needle: There will be a bit of stitching involved in this one so you’re going to need to bring a large needle
  • Embroidery Floss or Hemp: Use for stitching around the edge
  • Other Embellishment Options: Beaded Trim, Large Hook & Clasp, or Acrylic Paint (for painting the cuff)
  • Fabric Glue: For attaching the felt to the inside of the cuff

RESIN COIN CHARMS
  • Coins: Pennies, nickels, dimes, quarters…these or any other coin you want to use will be fine
  • Necklace Chain:  For your charms to hang from
  • Fancy Paper, Printed Image, Page from a book or Dictionary or Photo: You will be cutting this to the size of your coin (so if you are using an image or photo, make sure it’s small). It will be the focal image for your charm.
  • Embellishments: Beads or additional charms you would like to add to your necklace
  • Mod Podge Dimensional Magic: (this is the resin like base we will use to create the clear dome on coin after the image has been glued in place)
  • Mod Podge Clear Acrylic Sealer: Once the coin has dried (usually takes 24 hours) spray with acrylic sealer

GLASS PENDANTS
  • Glass (any shape): You can get these at most craft stores. The best brand I’ve found is Simply Swank. They come in the following sizes:
    • 1 set of 1" x 3/4" Rectangle Glass
    • 1 set of 1.25" x 3" Rectangle Glass
    • 1 set of 1.25" Square Glass
    • 1 set of 1.5" Circle Glass
    • 1 set of 3/4" Trapezoid Glass
    • 1 set of 1.25" x 3/4" Oval Glass
  • Fancy Paper, Printed Image, Page from a book or Dictionary or Photo: You will be cutting this to the size of your glass piece (so if you are using an image or photo, make sure it’s small). It will be the focal image for your Pendant.
  • Necklace Chain or Chord:  For your pendant to hang on
  • Simply Swank Silver Foil Tape: This is used to secure the front and back panel of glass together (with the image pressed between them).

SALT DOUGH CHARMSFor those coming to class, I will bring some pre-made charms for your to decorate along with dough for you to make your own from scratch

  • Cookie Cutter or Small Plastic Lid: If you have any small cookie cutters, you can use this to cut out different shapes for your charms. You can also use small caps or lids as a “make shift” cookie cutter for circular pendants. 
  • Acrylic Paint & Metallic Leafing: If you want to paint these charms you can do so with regular acrylic paint. If you want the charm to have the illusion of being made of metal, you can use Gold, Copper, or Silver Leafing (also found in the paint section of most craft stores). 
  • Necklace Chain or Chord:  For your pendant to hang on
  • Rubber Stamps: Any stamp or even a textured surface will work to add a design to your stamp. Any design work should be done
  • Mod Podge Clear Acrylic Sealer: Once the coin has dried (usually takes 24 hours) spray with acrylic sealer
TOOLS and ADDITIONAL SUPPLIES needed for all of these projects!
Glue Gun, Scissors, Paper Towels, Foam Brush, Empty Garbage bag (we’re using these to put under your frame to keep things clean), Washcloth or Rag (for wiping up paint drips)

I hope you have an amazing time using your creative influence to transform these and other ordinary objects into beautiful works of art!

God bless you all!
Jo


Saturday, October 20, 2012

Week 5 - Pumpkins, Pumpkins, Pumpkins!!!


For us Washingtonians, there's no denying it...it is officially fall. Wet roads, boots, scarves, Pumpkin Spice Lattes..fall is in full force. So naturally we had to incorporate the most popular and traditional craft project of the season....Pumpkins!!! 


But no need to bring out the carving knives or cover your floors with yesterday's newspaper, instead grab your glue guns, glitter, paper and mod podge and get ready to create the most chique pumpkins ever.


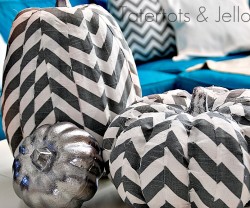
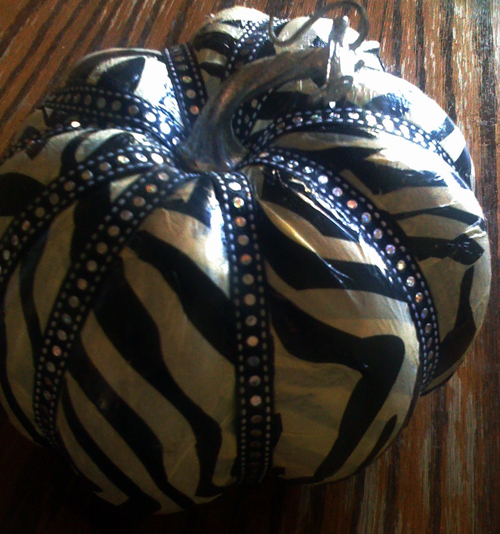
Here are some examples from Pinterest to give you a little inspiration!


PUMPKINS

Our lovely Kaitlyn Campbell will be the instructor for the project this week. She is super creative when it comes to decorating for parties, or weddings and pretty much any event! So this week, she’s going to show us some cute new ways to decorate pumpkins. Don’t worry we won’t be sawing gutting them….just dress’n them up and making them into fabulous center pieces that can be on display for the whole fall season!

This is a great tutorial if you are wanted to get a sneak peak at how to do this project: Mod Podge Pumpkin Tutorial


This project will be fun, and hopefully by now you are building up your supply resources so there is less you have to go out and purchase. As always, we’ll be sure to have some extra glue guns and some other basic supplies in case you don’t have them.


SUPPLY LIST

1. Pumpkin: Any pumpkin will do…you can even use a fake one if you want to use it again next year. Choose whatever size or shape you like!

2. Tissue Paper: You will be using this to cover your pumpkin so be creative in the colors you choose. You can pick up Tissue Paper pretty much anywhere and it’s really inexpensive which is always a plus!

3. Scrapbook Paper: We’ll also be using this to cover the pumpkins so mix and match it with your tissue paper!

4. Modpodge: After the canvas week you are all pros at using Modpodge and hopefully you have some left over! Since we’ll be using this as the “glue” for adhering the paper to your pumpkins you’ll want to bring enough. (Hint: For this type of project Elmers Glue with a little bit of added water will work as a substitute for Modpodge.)

5. Embellishments – This is where you can let your creativity run wild. You can add whatever you want to your beautiful pumpkin creation! Here are some suggestions: fine glitter, rhinestones, puff paint (for adding delicate designs), paint, feathers, leaves, ribbons….etc, you get the picture!

Additional Tools and Supplies Needed!  
  • Scissors
  • Paper Towels
  • Foam Brush 
  • Empty Garbage bag (we’re using these to put under your pumpkin to keep things clean)   
  • Rag (for wiping up drips)
  • Pencil or a Sharpie Pen
  • And of course a GLUE GUN!
This is going to be such a fun project and something you'll be proud to display for all your friends and families thought out the entire season.

I can’t wait to see teach this project and see what you all come up with. And remember to send us pictures of you finished products each week so we can post you beautiful creations!
God bless all you beautiful ladies!

Jo


Friday, October 12, 2012

Week 4 - Jewelry Boards!!!


As I mentioned last week, we were on a very tight budget for Christmas last year so Pinterest became my "go to" for Christmas gift ideas. One project I fell in love with was Jewelry Boards! They don't take very long to make, they use very few supplies AND they are honestly the best solution to organizing your jewelry. Every girl should have one of these...and if they don't have one, you should make them one!!!


Below are some different examples of Jewelry Boards so you can get some ideas...


These are two Jewelry Boards that I made and use daily!
I love them and they hold all my  earrings and necklaces perfectly!
This "R" on this one was done using the freezer paper stencil technique! Click here for tutorial.

This one is done using a strip of wire mesh and actual wire. 
This one was done on a wood board rather than using a frame. 


This one was created using an old radiator grate! Love it! Click here for tutorial.


Jewelry Boards

This project is fun because a lot of the supplies are things you can pick up at garage sales, second hand stores, or you may even have some of these supplies collecting dust in your very own garage. Just like our other projects, these boards are very easy to customize and allow you the freedom to get as creative as you want! They also make AMAZING birthday and Christmas gifts so keep that in mind for the holidays as well!

Gathering Supplies

Hopefully you'll be able to use some of your previous supplies as well as your savvy saving skills for gathering your supplies this week. I encourage you to try and get the majority of your supplies from your own home, Goodwill, Value Village, or any other second hand store in your area (and if all else fails, stop by the parents house and ask to rummage through their house....guarantee they'll have an old frame or two laying around that you can snag). There are a few supplies you will probably need to purchase elsewhere, but now that you are getting to know each other better, you can always shop together and split the cost of the supplies!

Supply List

1.       Old Picture Frame: If you have any old frames lying around or pictures with a frame that is just collecting dust…then use that one. Otherwise you can check out your local second hand store and see what they have…it’s always hit or miss. Don’t worry if the frame is an ugly color or even if it has scuffs or scrapes…we’ll be painting them and little dings are perfect because they add character! The only thing you will want to make sure of is that the frame is made of wood and it is no less than two inches wide.


  • QUICK TIP: A trick to finding cheap new frames is by going to a store that does custom framing (JoAnn’s,  Michaels, Aaron Brothers,…) and asking if they have any damaged frames for sale or frames that were returned because they were cut to the wrong size.


2.      
Fabric or Wire Mesh: The fabric you use is what you will be hanging your Jewelry from, so you want to be sturdy enough that it can hold all of your jewelry. Also, make sure you have enough material to cover the entire frame as well as the opening in the middle. You want the material to be at least in inch larger than the frame on all sides.

  • Suggestions for Fabric and Mesh selections: You can use Burlap (such as an old coffee sack), Denim (tear up some of your old jeans), Thick Lace (maybe from an old table cloth or curtain from good will) or any type of Wire Mesh
    • FREE BURLAP TIP: Local Coffee Roasters often have their beans delivered in Burlap Sacks which they end up throwing away after they dump the beans out to be roasted. This burlap is GREAT for all the projects we’ve been doing and since its garbage to them; they’re usually willing to give it away for FREE!!! So if you know of any local coffee shops that roast their own coffee go in and ask them for their left over burlap sacks!


    • CHEAP WIRE MESH TIP: A great and cheap Wire Mesh option is Yardgard Hardware Cloth. You can get it at Home Depot (2 ft. x 5 ft. x 1/4 in. 23-Gauge Galvanized Hardware Cloth) for $9.77 a role. It’s 5 ft, so you could probably split it with someone else and then it would only be $4.50 each!)


3.      
Paint
: We will be painting the frames (unless you like the way it looks already, then you can skip this step). For those who want to take the creativity up a notch, we will also be using the Freezer Paper method I showed last week to create our own stencils which you will paint right onto your fabric.  You can use any paint for both the frame and the fabric…acrylic paint, regular house paint, spray paint, as long as it is not oil based you’re good to go!


  • CHEAP PAINT TIP: A great place to pick up cheap and durable paint is at the hardware or even at Fred Meyer or Walmart. They usually have paint samples in the house paint section that come in 4oz – 8oz containers and are premixed. They generally have  a good selection of colors and since they are intended for painting walls, they’re pretty durable and water resistant!


4.       Sponge - A clean kitchen sponge or a dollar store sponge will work. This is how we will apply the paint to the stencil

5.       Ribbon, Chord or Chain – This is how you will hang your board. I’ll have a staple gun so we can attach it at the end of class!

6.       Knobs or Hooks (Optional) – For those who want more hanging options for necklaces, adding hooks or knobs to the bottom of the frame is a great option! You can often find bags of old kitchen nobs and at Goodwill or Value Village along their back walls. You can also buy a bag of hooks any store that has a hardware section. JoAnn’s has some really cute decorative door knobs as well so if you have your coupons you can go there and probably pick a few up for not too much. Be creative too! Look around your house and see if there are things that you can use as hooks or knobs…or ask your friends or neighbors if they have any. 

7.       Freezer Paper or Stencil (Optional) If you have a stencil that you want to use to paint on your fabric, bring it.  If you want to venture out and try to create your own Freezer Paper Stencil here is a few tutorials on different ways to create your stencil. The easiest way that I have found is to either print your image directly onto the mat side of your Freezer Paper OR print our your design on regular paper and trace it onto the Freezer Paper.


Supplies needed for Freezer Paper Stencil Project


8.      Tools and Additional Supplies Needed for all the projects!

  • Scissors
  • Paper Towels 
  • Paint Brush (You’ll only need this if you are painting your frame)
  • Empty Garbage bag (we’re using these to put under your frame to keep things clean)
  • Washcloth or Rag (for wiping up paint drips, Staple Gun (If you have one great, if not, I’ll have one there so no worries)
  • Exacto Knife & Cutting Board (if you are doing the Freezer Paper Stencil)
 I can't wait to do this project with you ladies! Start shopping and keep and eye out for sales or call each other and shop or rummage together and get the best bang for your buck!

See you Monday! Love you tons!
Jo

Wednesday, October 3, 2012

Week 3 - Canvas Art!!!

Last Christmas we were really tight on money so I decided to make gifts for everyone instead of buying them. We've all received "handmade" gifts....sometimes they're really cool or useful but often they end up living in the corner of our closet under the heap of junk we've been meaning to take to Goodwill. I didn't want to give "that" kind of homemade gift which in the end is more of a burden than a blessing to the recipient. I decided to turn to Pinterest (or more accurately...I decided to feed my Pinterest addiction) and found an inexpensive, quick, tasteful and easy to customize gift option.......CANVAS ART!

If you go to Pinterest and type "canvas art" in the search bar, you will see countless different techniques for turning a plane white canvas into a beautiful work of art! The best part is, you don't have to be Michael Angelo, Rembrandt, Monte, or Thomas Kinkade to create a piece that is worthy of showcasing above the fireplace or on a main focal wall. 

Below are some of my favorite canvas projects. At the bottom I'll show you the three canvases we will be working on this Monday and the list of supplies you need for each. If you want to brave all three you are more than welcome to, but if you prefer to just focus on one, you can do that as well! 

I can't wait until Monday! We're going to have a great time working on these together! Okay, now scroll down and check out these amazing canvases and let the creativity flow!

God bless you ladies!
Jo

My FAV Canvas Projects!!!

Some of these projects were done on wood, but we can do the same design for less work, less money, and still end up with a piece just as awesome as the pic's below.

(Original Art from unknown source)
This one is done on wood but the same design can be created on canvas using freezer paper,  paint, and an iron!

(Orignal Art Winthrop Chronicles)


(Original Art B is For Brown)

Okay, so once again these aren't technically on canvas, they are on poster board, but it's such a cute design I couldn't resist and it is totally something that could be done on canvas therefore I deem them applicable for this project!


(Orignal Art from Unknown Source)

(Original Art from Photo Barn)
(Original Art from Blue Cricket Design)

(Original Art from The Johnston's)

So for those who have left over burlap from the wreath project, this is a great use for any scraps you may have laying around.

(Original Art from Brassy Apple)

(Original Art from A Beautiful Mess)

(Original Art from unknown source)

 (Original Art from Two Peas in a Bucket)

 (Original Art from Not On the High Street)